As it is my daughter’s birthday approaching, I like to create things and decorations for this year’s party. Last year was an Alice in Wonderland theme, this year is going to be unicorn themed. What better way to keep off a Unicorn theme, then to have an actual unicorn, well unicorn head anyway. So I set out on my quest to make one out of paper mache. Who doesn’t love whimsical 3D artwork?
To start off, I made a ball out of newspaper and then secured it with masking tape. I did this 3 times, each one slightly smaller than the first. This will be the head.

I secured the 3 balls together with masking tape then wrapped them in another sheet of newspaper and then used the masking tape to contour the different shapes I needed.

I then formed the neck in the same way and then attached it. I also cut a oval shape out of cardboard to attach to the neck so this can be easily mounted.

For the first lot of paper mache, I used paper towels and a boiled paste. I did this by using 1 part flour and 4 parts water as this is what worked best for me. You might need to do a but of trial and error to make sure that it is the right consistency. Bring the mixture to boil, stirring continuously until it is a soupy texture (like bechamel sauce in consistency).

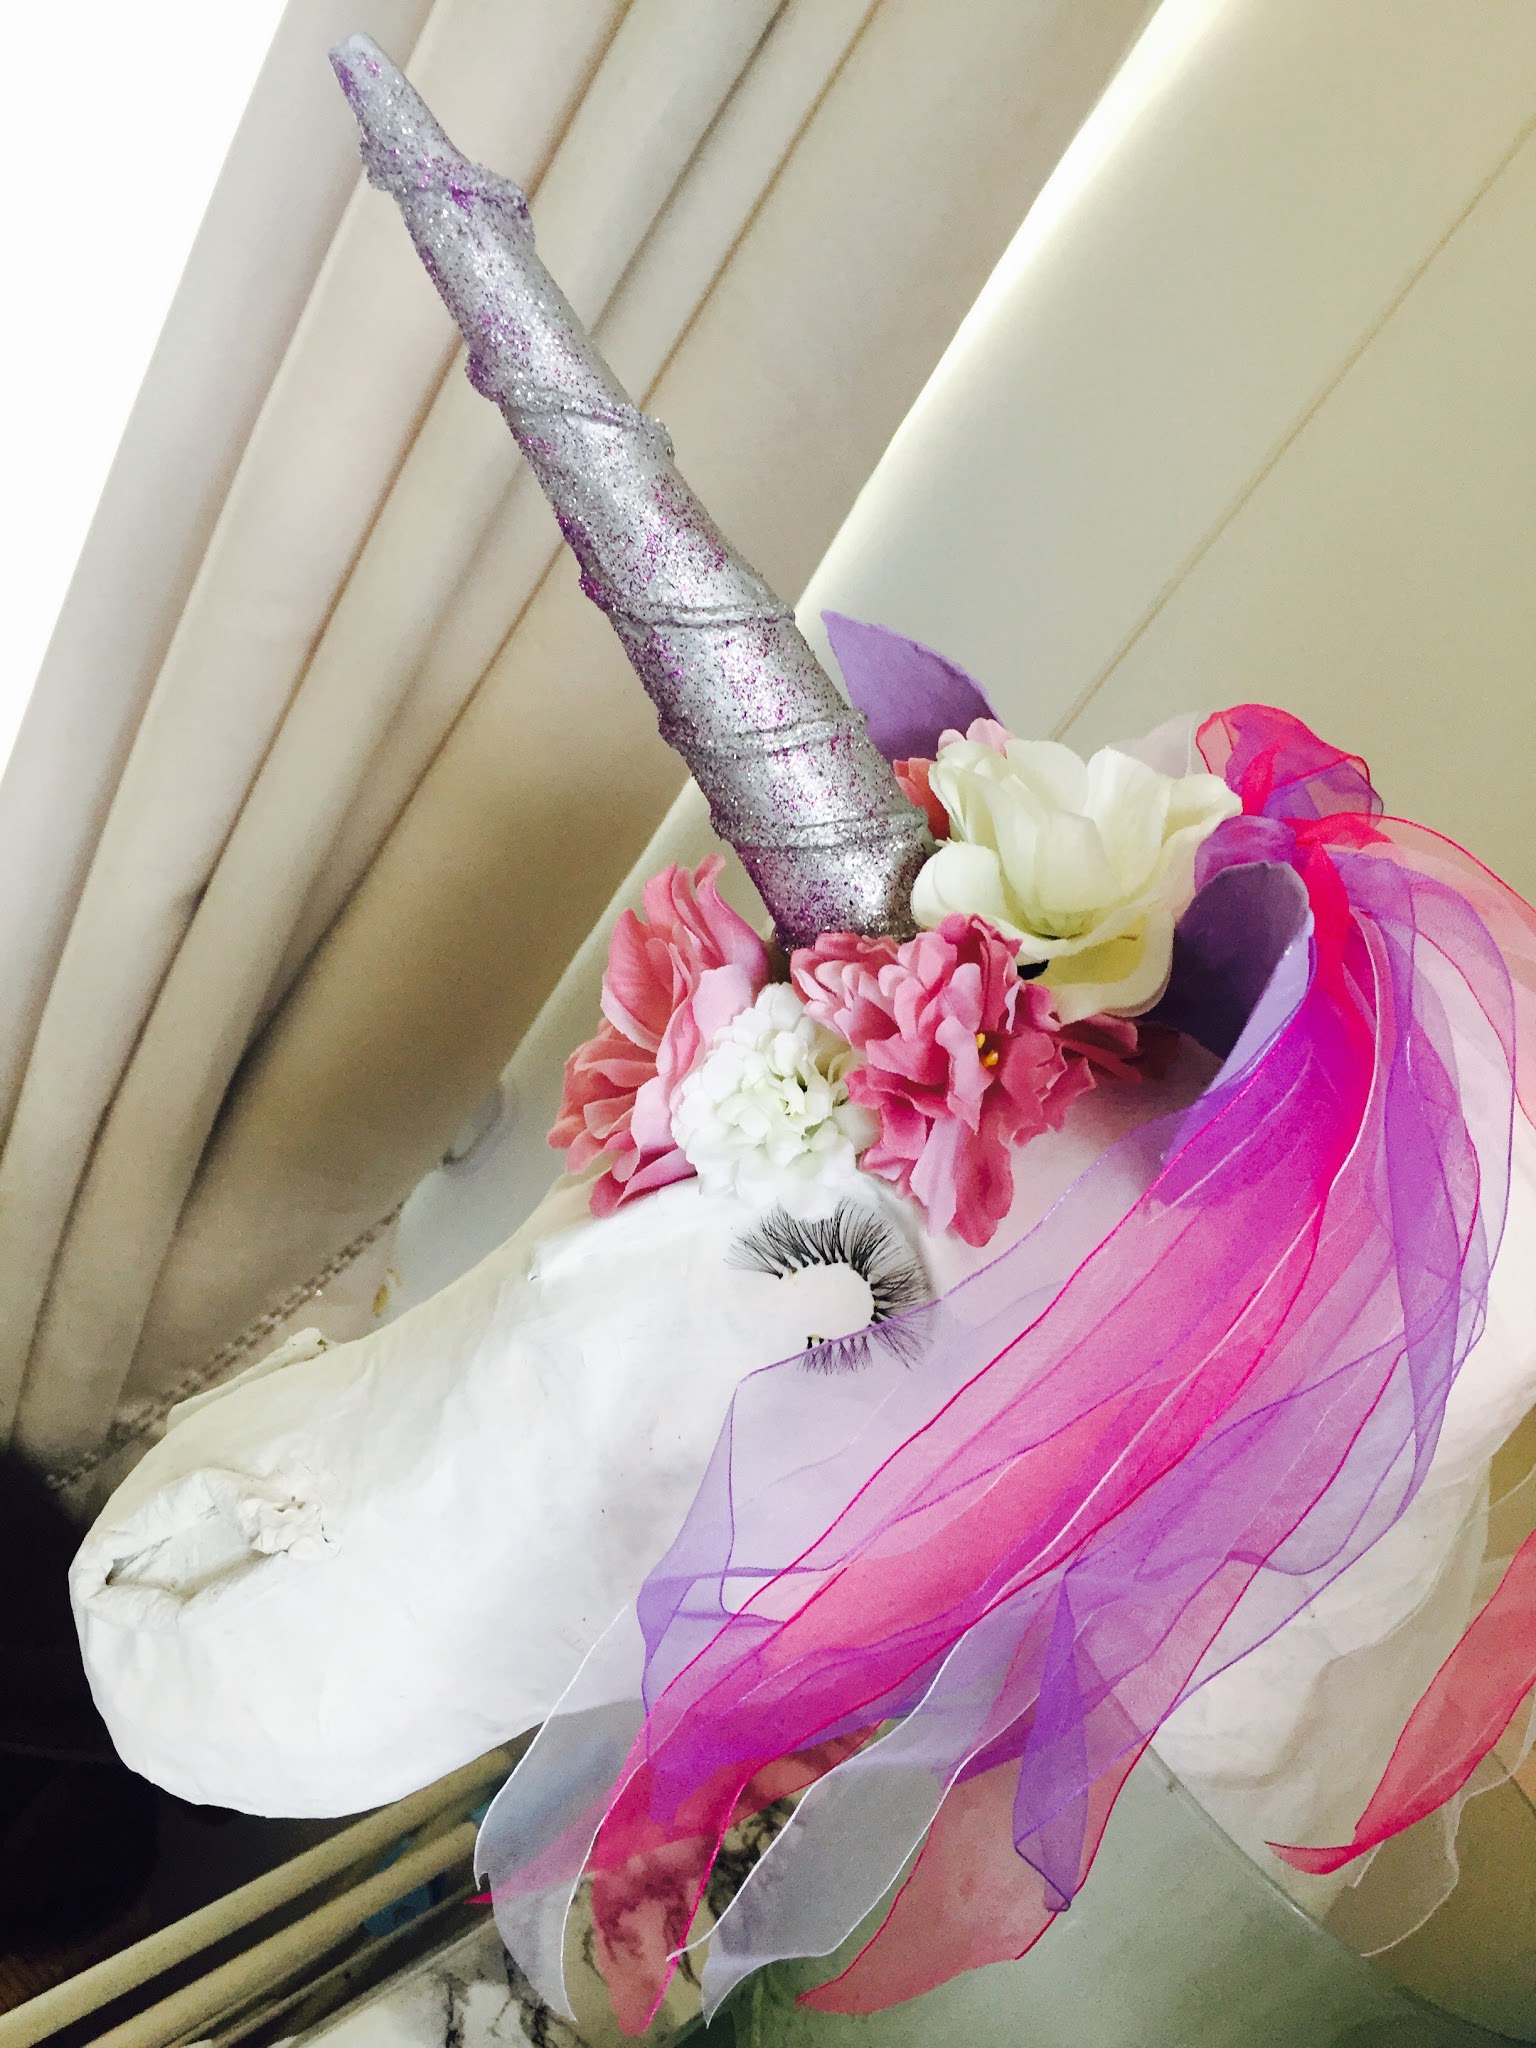
I made the ears out of cardboard and slightly bent them round. The horn was shaped out of paper and was all secured using masking tape.

I let the paper towels and boiled paste to dry overnight and then started applying newspaper, layer by layer. In total I think I did around 4-5 layers. Again, let it all dry completely overnight.

I painted the entire unicorn white, this took a couple of coats. I also added some string to the horn to give it that spiral textured unicorn horn look, and then I decorated.
This step is your choice on how you would like your unicorn to look but i went for purple ears, which I painted. I sprayed the horn silver and covered with silver and purple glitter. I glued down the flowers (I just picked up 2 headbands that had flowers on them and cut them off but you could also buy flowers from a craft store or online). I then added the mane (again from 2 hairbands I found). I thought for an added bit of fun, to stick down some individual eyelashes I had laying around. TaDaaaaa, it’s finished.
If I begin to make anything else for this themed birthday, I will try and note them down to share with you all in case you are looking for ideas for an approaching birthday/occasion.